IoID Web ToolsIoID Web Tools are designed to streamline experimentation and development for integrating IoID into DePIN projects. These tools, currently under development by the IoTeX Foundation, aim to provide a seamless and interactive user experience for creating and managing IoID-based projects. While this page explains how to register your project in IoID using the
ioctl command line, you can achieve the same using the IoID Web Tools where you can list, and manage all your projects interactively, including deploying a default Device NFT contract.Prerequisites
Prerequisites
Before you begin working with the IoTeX blockchain and related tools, follow these preliminary steps to set up your development environment.Note the If needed, export the private key with:
Tools
Ensure you have the following tools installed:- ioctl: For interacting with the IoTeX blockchain.
- curl: For sending messages to the API node.
- jq: Optional, to format JSON output.
Create and fund a Developer wallet
Start by creating an IoTeX developer wallet and funding it with test tokens.0x wallet address provided. Set ioctl on the IoTeX testnet:Claim test IOTX
You can claim test IOTX tokens on the IoTeX Developer portal at https://developers.iotex.io/faucet.Configure Metamask: if you need to configure Metamask with IoTeX for convenience, you can do so on the Check the balance of your wallet with:1. Register your DePIN Project on IoTeX
In this step, you will register your project on the IoTeX blockchain. This process generates a unique Project ID, which serves as an on-chain identifier for your project, enabling the verification of devices associated with it.Create and fund the Project Owner account
Ensure your ioctl is up to date with0x wallet address provided. You can claim test IOTX tokens on the Developer portal at https://developers.iotex.io/faucet or ask on our developers channel on Discord.
Let’s export the private key:
Register your project on IoTeX
Project ID and set it as an environment variable:
Clone the ioID contracts repository
To begin, clone the ioID contracts repository from GitHub. This repository contains the ioID smart contract code you will interact with, as well as related resources, including example contracts:Deploy and link the Device NFT Contract
To finalize the integration with ioID on the blockchain side, your project must include an ERC721 NFT contract. This contract can be fully custom and allows you to pre-register devices on-chain, providing flexibility to manage and customize the binding process before linking devices to owner accounts. Once you have the address for your NFT contract, you can link it to your Project ID with:Deploy with Hardhat
If you don’t already have an NFT contract for your devices, you can deploy the example provided in the ioID contracts repository. The example script below will perform the whole process of deploying the example Device NFT Contract, registering a project ID, linking the NFT contract to the project and finally reserving some ioID for the projectDeploy from the IoTeX Hub
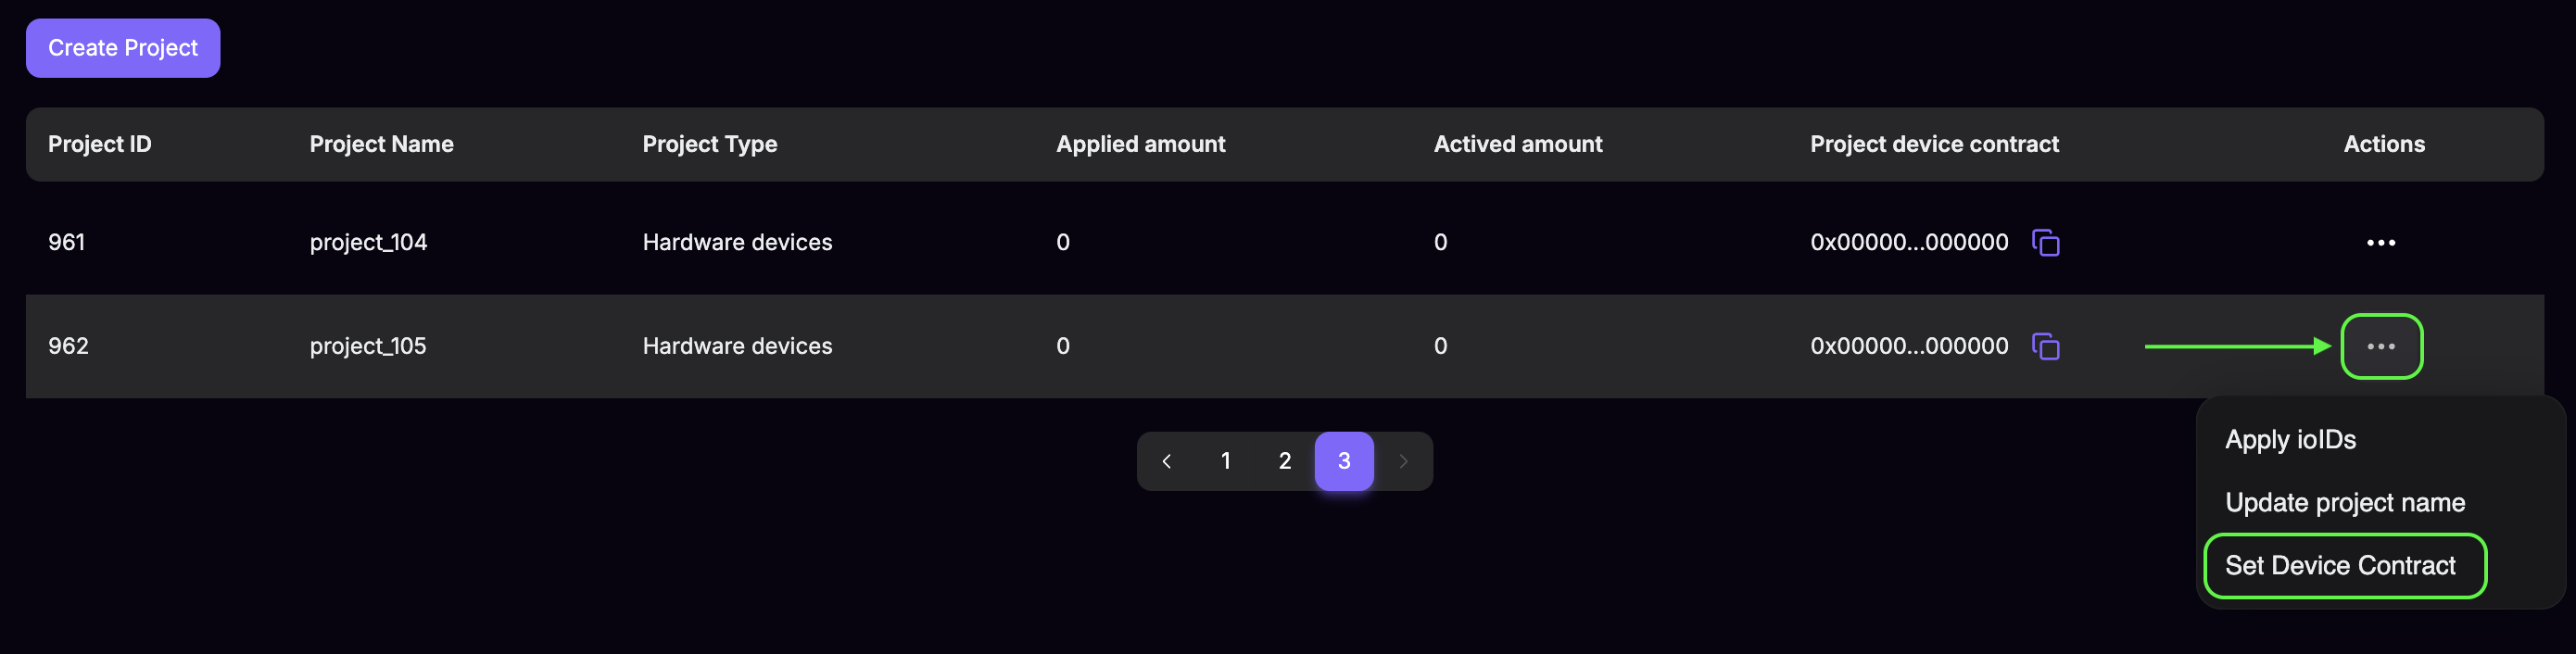
The same process can be performed using the ioID Web Tools on the IoTeX Hub Portal:- Create a new project using the Create Project button if you haven’t registered one already
- Identify your project id on the IoTeX Hub
- Select
Set Device Contract → Deploy Device Contractfrom the Project’s actions menu